How to Prepare for Bed Bug Treatment Checklist
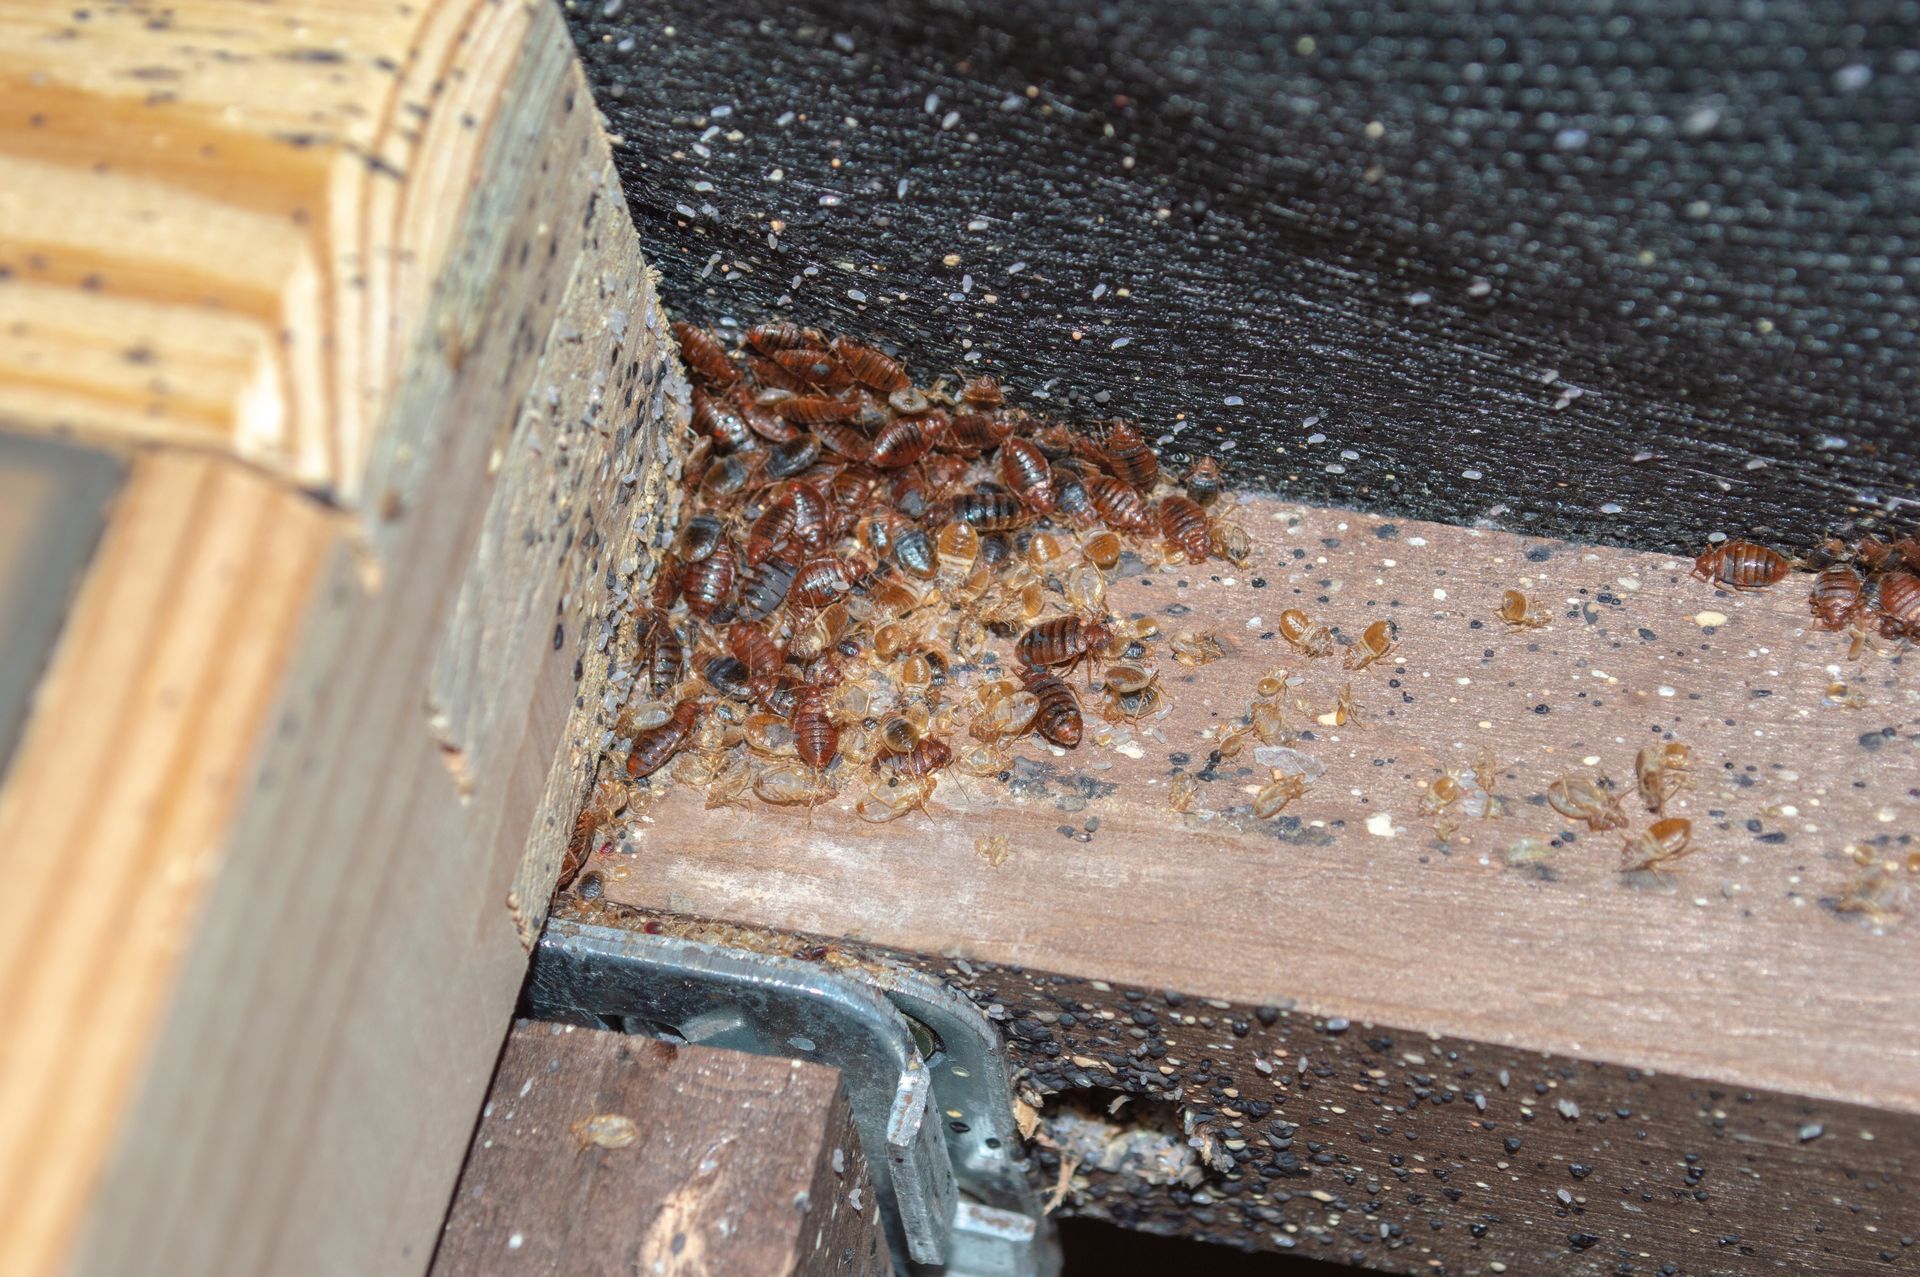
Preparing your home for bed bug treatment is a crucial step in combating these blood sucking parasites. Whether you've decided to tackle the infestation on your own or if you're bringing in a pest management professional, the groundwork you lay before treatment begins is vital. Effective preparation not only facilitates a smoother extermination process but can also significantly reduce the overall costs and time involved. This initial effort requires a meticulous approach that ensures that every nook and cranny is exposed so bed bugs have no place to hide.
The specific steps necessary to prepare your home will vary depending on the type of treatment plan you choose and the scope of the infestation. However, there are general guidelines that all homeowners and tenants should follow to aid in the effective extermination of bed bugs. These preparatory actions are not just about tidying up. They’re about taking strategic measures that bolster the efficacy of the extermination efforts. From understanding the importance of decluttering to knowing how to handle your belongings safely, preparing for bed bug treatment is a critical process that should not be overlooked.
Different Types of Bed Bug Treatments
When it comes to eradicating bed bugs, there are several treatment methods available, each with its own set of strategies and effectiveness. The most commonly employed techniques fall into two main categories: chemical pesticide treatments and bed bug heat treatments. Both methods require careful preparation and professional execution to ensure the safety of occupants and the effectiveness of the extermination process.
Chemical Pesticide Treatments
Chemical pesticide treatments for bed bug infestations involve a strategic application of various chemical agents designed to target bed bugs in all their hiding places within a home. This method typically employs a multi-faceted approach that utilizes three distinct types of chemicals: a contact insecticide that offers immediate results by killing bed bugs on contact, a residual chemical that continues to act over time to eliminate any bed bugs that emerge after the initial treatment, and a dust formulation that provides extended protection by settling into cracks and crevices where bed bugs are likely to hide. This comprehensive strategy ensures that not only are the visible bed bugs eradicated, but also those lurking unseen are effectively targeted to provide a thorough treatment solution.
The key to the success of chemical treatments lies in their precision and the ability to reach bed bugs directly. Unlike heat treatments that affect an entire area uniformly, chemical treatments are more site-specific and require careful application to all potential bed bug hideouts. This specificity often necessitates multiple visits from the bed bug control expert to ensure that no areas are missed, and that the treatment remains effective over time. The process demands careful planning with preparation, execution, and ongoing monitoring to assess the effectiveness of the treatment and make adjustments as necessary. For homeowners, understanding the commitment required for chemical pesticide treatments is essential, as it involves not only preparation before the treatments but also cooperation and patience through potentially several rounds of treatment to fully eradicate the bed bug infestation.
Heat Treatments
Bed bug heat treatments stand out as an exceptionally effective solution in the battle against bed bug infestations. This method leverages the vulnerability of bed bugs to high temperatures which ensures that adults, nymphs, and even eggs are eliminated within minutes after being exposed to the bed bug critical heat threshold. The process, however, is complicated and involves more than just cranking up the heat. It requires a carefully controlled environment to ensure that the heat penetrates bed bug hiding spots effectively, without causing damage to the property or harm to the inhabitants.
The success of a heat treatment hinges not only on the execution of the procedure itself but also on the preparation and cooperation of the homeowner or tenant. From removing heat-sensitive items to ensuring that the structure is appropriately prepped for the treatment, the responsibilities of the residents are paramount. Failure to adhere to the preparatory checklist can not only diminish the effectiveness of the treatment but also pose risks to safety and potentially voids any warranties provided by the pest control service. Understanding the complexity involved in a bed bug heat treatment is essential for anyone considering this method for bed bug extermination and emphasizes the need for a collaborative effort between the pest management professionals and the client to ensure a successful and safe outcome.
What You Need to Prepare for Bed Bug Treatment
Ensuring you have the right tools and materials on hand before the pest control professionals arrive can make a substantial difference in the bed bug treatment's success. Here's a checklist of essentials you'll need to gather:
- Strong trash bags: Essential for disposing of infested items that cannot be salvaged and for transporting items to be laundered.
- Washer/dryer combo that can reach temperatures over 130°F: High temperatures are lethal to bed bugs at all life stages which makes a hot wash and dry cycle a crucial step in treating infested clothing, bedding, and other fabric items.
- Vacuum cleaner: A key tool in removing bed bugs and their eggs from mattresses, furniture, carpets, and other surfaces before and after treatment.
- Steam cleaner: Offers a chemical-free way to kill bed bugs and their eggs on contact by delivering high-temperature steam to infested areas which is particularly useful for upholstery, carpets, and mattresses.
- Mattress encasements and bed bug interceptors: Encasements prevent bed bugs from entering or escaping mattresses, while interceptors placed under bed legs can trap bed bugs and prevent them from climbing onto your bed.
Preparing your home with these tools and adhering to the guidance provided by pest management professionals can create a hostile environment for bed bugs.
When Does Preparation Need to Be Started
Initiating the preparation for bed bug treatment in a timely manner is crucial for ensuring the success of the eradication efforts. All necessary preparatory tasks should ideally be completed within a few days prior to the commencement of the bed bug treatment. This timeframe allows for thorough and careful execution of all recommended steps, from laundering and encasing bedding to decluttering and vacuuming. Starting too early might give bed bugs a chance to re-establish themselves, while starting too late could leave insufficient time for proper preparation which can potentially compromise the effectiveness of the treatment.
Bed Bug Treatment Preparation
As you gear up for bed bug treatment in your home, having a clear and concise checklist at hand is useful for ensuring that every necessary step is taken to prepare effectively. This checklist serves as your roadmap, guiding you through the critical tasks required to set the stage for successful bed bug treatment.
#1 Identify Problematic Areas
It is important to identify the problematic areas within your home. This involves a detailed physical inspection for signs of bed bugs, their eggs, and shed skins around beds, furniture, and other potential hideouts. Spotting these signs is pivotal in determining the scope and focus of the treatment efforts. Identifying these infested areas early on not only helps in tailoring a more effective extermination strategy but also assists in preventing the spread of bed bugs to other noninfested parts of your home. Paying close attention to these details ensures that no infested area is overlooked and sets a solid foundation for the subsequent steps in the bed bug eradication process.
#2 Be Sure to Prevent the Spread of Bed Bugs
The second step in preparing for bed bug treatment is halting the spread of the infestation by ensuring that any areas with bed bugs are contained. Once bed bug infested areas are identified, it’s important to quarantine known infested areas to prevent bed bugs from migrating to cleaner parts of your home. When taking steps to prepare for bed bug treatments, it is important to start in rooms that are not infested and then finish up with rooms that are infested. This helps prevent moving items from infested zones to uninfested ones which can reduce the likelihood of spreading the pests and exacerbating the problem. Any trash or belongings from infested spaces that are suspected of harboring bed bugs should be sealed in plastic trash bags immediately. Once filled, these bags should be taken directly to an outdoor bin.
It's also not a good idea to relocate any personal items to another location, such as another home or a workplace, before or during the treatment unless you are confident the items are not infested. Even items that appear clean can harbor bed bugs and spread the infestation to new areas. This risks infesting a new location and potentially re-infesting the previously treated area if these items are returned after treatment is completed.
#3 Eliminate Clutter
Diligently eliminate any unnecessary clutter from your home. Clutter provides an ideal hiding place for bed bugs which makes both detection and treatment significantly more challenging. Begin by discarding unnecessary items such as old magazines, newspapers, and especially cardboard boxes which offer the perfect place for bed bugs to hide. Opt for clear plastic storage boxes instead because their interiors have smooth surfaces that make it hard for bed bugs to escape as well as clear walls that allow you to see bed bug activity. Take this opportunity to declutter your living space by getting rid of unused or unwanted clothing and belongings. A clutter-free home not only facilitates a more efficient inspection and treatment process but also reduces the overall number of hiding spots available to bed bugs.
#4 Vacuum
The fourth step involves thorough vacuuming of your entire living space. This means diligently vacuuming all floors, carpets, rugs, baseboards, bed frames, sofas, and any other furniture or crevices where bed bugs could hide. Vacuuming serves as an effective method for physically removing bed bugs and their eggs from your environment. After vacuuming, it's important to remember to properly dispose of the vacuum bag to prevent any captured bed bugs from escaping back into your home. To do this, immediately seal the vacuum bag in a plastic bag and dispose of it in an outdoor trash bin.
#5 Laundry
The fifth step in your bed bug treatment preparation focuses on the critical role of laundry in combating these pests. Heat treatment of clothing and other fabric items is a powerful tool against bed bugs but it requires items to be subjected to high temperatures to ensure their elimination. Begin by placing all laundry including sheets, blankets, pillowcases, clothing, small rugs, stuffed animals, and curtains into plastic garbage bags marked "To Wash." In order for laundry to be effective, the temperature must exceed the bed bugs’ thermal threshold for 30 minutes. In order to do this properly, the items first need to be dried on high heat for a full 30 minute cycle or more before being washed on high heat and dried on high heat again. The reason for this is because washing an item on high heat first may not expose the laundered items to the thermal threshold for a long enough period. By drying first before washing, you can ensure that the appropriate temperature is reached for the necessary time.
Following this, store the cleaned items in new, sealed plastic bags to keep them bed bug-free until the treatment is complete. This process helps quarantine treated items to prevent these items from becoming reinfested before treatment is completed. For items that cannot be washed, such as certain rugs and upholstery, placing them in the dryer on a high heat setting for the required time can also be effective.
#6 Furniture Preparation
The thorough preparation of your furniture plays a critical role in facilitating access for treatment and preventing the further spread of bed bugs. This involves moving all furniture and belongings at least 60 cm or 24 inches away from the walls to allow pest control professionals clear access to the room's perimeter which is one of the most common areas where bed bugs hide and travel.
Avoid stacking or placing small items atop other pieces of furniture as this can create new hiding spots for bed bugs and obstruct the treatment process. Instead, empty all drawers and closets, and securely store the contents in plastic tubs or bags. These containers should then be placed in the center of the room. This careful organization and preparation of your furniture and belongings not only streamlines the treatment process but also increases its effectiveness by exposing all potential bed bug hideouts to professional intervention.
#7 Remove Anything Hanging on the Walls
Remove anything hanging on the walls like posters, picture frames, clocks, and any other decorative items or wall-mounted fixtures. This task is crucial because bed bugs are known for their adept hiding and climbing abilities and can find refuge in the space between the walls and hanging fixtures. By taking these items down, you not only eliminate potential bed bug hideouts but also provide pest control professionals with unobstructed access to treat your walls and any cracks or crevices that could harbor bed bugs.
#8 Preparing Loose Items
The eighth step in your comprehensive preparation for bed bug treatment involves storing loose items that cannot easily be washed or treated through conventional methods. These items include books, electronics, and plastic toys. Each of these items requires a careful inspection to ensure they are free of bed bugs. In cases where chemical insecticides will be applied, it's crucial to safeguard children’s toys and similar items by storing them in plastic bags or bins, provided they are confirmed to be bed bug-free. Conversely, if a heat treatment method is chosen, the pest control service might advise leaving these items in place to ensure they are adequately exposed to the heat, thereby ensuring any hidden bed bugs are eliminated.
#9 Seal Bed Bug Entry Points
The final step in fortifying your home against bed bugs involves sealing all potential entry points to deter future infestations. This preventive measure includes caulking cracks and crevices around baseboards, repairing any damage to wallboards, patching holes, and securing loose wallpaper. Such thoroughness ensures that bed bugs are deprived of their common hiding spots and entry routes into your living spaces.
Room by Room Bed Bug Treatment Preparation
The preparation for bed bug treatment is a thorough process that extends beyond general household considerations. It also requires a focused approach that addresses each room's unique challenges and characteristics. While the initial steps provided a broad framework applicable to the entire home, the subsequent phase of preparation demands a room-by-room strategy. This tailored approach ensures that each area receives the specific attention and treatment it needs, based on its particular use, furniture, and potential bed bug hideouts.
Bedroom - Preparing Your Bed
Preparing your bedroom for bed bug treatment involves a series of strategic steps aimed at minimizing hiding spots and creating barriers against these persistent pests. The bedroom, being a primary site of infestation due to its proximity to sleeping humans, requires particular attention. Here's how to prepare your bed and surrounding area:
- Move the bed at least 2 feet away from the wall to prevent bed bugs from accessing the bed from the wall.
- Place bed-bug-proof covers or liners on your mattress and box spring. These encasements should be durable and zippers that close completely to trap bed bugs inside. This ensures that existing bed bugs are contained and prevents new ones from finding a hiding place.
- Ensure all bedding is tucked under the mattress post-cleaning and treatment, so it does not touch the floor and provides a bridge for bed bugs to reach a host.
- Install bed bug interceptors under each bed leg. These devices trap bed bugs attempting to climb into your bed as well as serve as a crucial part of ongoing monitoring. Inspect these daily at first and plan to use them for at least a year.
- Remove anything stored under the bed and keep these items in the same room to prevent spreading the infestation. Each item should be inspected and either cleaned or discarded as needed.
- Vacuum the mattress and box spring thoroughly to remove any live or dead bed bugs. Immediately dispose of the vacuum bag in a sealed plastic bag and then place it in an outdoor trashcan to prevent reinfestation.
- Steam clean the mattress to effectively reach all of the tight spaces that may have been difficult for the vacuum to reach. This ensures that bed bugs in the seams or folds of the mattress are also killed.
By adhering to these steps, you transform your bed into a safe zone free from bed bugs and significantly reduce the likelihood of future infestations. This preparation not only facilitates the effectiveness of the treatment but also ensures that your sleeping space is bed bug free while treatment is being completed.
Living Room - Inspect and Clean All Items in Living Areas
Preparing the living room for bed bug treatment is a vital step given that living areas often contain a mix of high-traffic furniture and numerous hiding spots for bed bugs. The goal is to inspect and clean thoroughly to eliminate any existing bed bugs and to facilitate the treatment process. Here are key actions to take:
- Clean all wooden and upholstered furniture using a steam cleaner, focusing on areas like screw holes, wooden joints, and upholstery creases where bed bugs can hide.
- Check and clean baseboards to remove any visible bed bugs or eggs, as these areas offer perfect hiding spaces for pests.
- Transport any items that need to be moved in sealed plastic bags, whether it's clothing, linens, or drapes that require heat treatment in the dryer. This includes removing and cleaning drapes and their hardware.
- Vacuum couches, chairs, and recliners thoroughly, including underneath them. If the furniture has a dust cover on the underside, pull it back to vacuum inside. Immediately seal and dispose of the vacuum bag in an outdoor trashcan to prevent spreading bed bugs.
- Pull furniture at least two feet away from walls and baseboards to give exterminators access to treat hard-to-reach areas.
- Empty and inspect all storage areas like bookcases, desks, and closets. Launder what you can and inspect items that cannot be laundered. Keep electronics off the floor and away from walls, turned off and unplugged.
Kitchen
Preparing your kitchen for bed bug treatment is less critical because this space typically isn’t where you would normally find an active bed bug infestation. The kitchen just doesn't typically serve as a primary habitat for bed bugs due to the lack of hiding spots close to human hosts. However, whole house treatment requires each room to be treated, otherwise you risk the possibility of a stray bed bug reinfesting the entire home. Here’s how to ensure your kitchen is ready for treatment:
- Store all dishware, pots, pans, and other small kitchen items in closed cupboards, drawers, or sealed storage containers to protect them from treatment sprays or heat. After careful inspection, these items can typically be stored in containers to prevent them from being sprayed with harsh chemical pesticides.
- Contain all food items in the fridge or in sealed plastic containers to safeguard them against potential spoilage from heat treatments or contamination from pesticides.
- Clear items from kitchen counters and appliances such as fridges, stoves, microwaves, toasters, and dishwashers to ensure a thorough treatment.
- Sweep and steam clean the kitchen floor to remove any food particles or debris that might attract bed bugs.
- Remove all items from cabinets and storage areas. It’s best to place these items in sealed bags or containers to prevent any exposure to treatment chemicals or heat.
Bathrooms
Preparing your bathroom for bed bug treatment involves attention to both textiles and personal items to ensure these items are protected from treatment effects. Here's how to get your bathroom ready:
- Place all towels, bathmats, and washable rugs in a plastic garbage bag, tie it tightly, and mark it with "To Wash." Wash these items following the laundry protocol designed to kill bed bugs as soon as possible. Avoid returning clean items to the bathroom until after the treatment is complete to prevent re-infestation.
- Remove all items from medicine cabinets, under-sink storage, drawers, and windowsills to ensure these areas are accessible for thorough treatment.
- Inspect all personal items such as toothbrushes, toothpaste, cosmetics, toiletries, and medications. Once inspected, place them in sealed plastic bags. These bags can be stored in the bathtub or another safe area during treatment.
What Should You Do with Pets and Plants?
Preparing your pets and plants for bed bug treatment is crucial for ensuring their safety and health, as well as the effectiveness of the treatment. Pets can be stressed by the upheaval and may also be at risk from treatment chemicals or the high temperatures used in heat treatments. Here's how to safeguard your furry, feathered, or finned friends as well as your green companions:
- Take your pets with you when you vacate your home before the treatment starts. Ensure they are kept away from the home for a minimum of 12 hours after treatment to avoid exposure to any harmful residues or extreme temperatures.
- All kinds of pets must be moved including birds, rabbits, hamsters, cats, dogs, and fish in small bowls to ensure their safety during the treatment process.
- For large aquarium setups, things become more complicated due to the method of treatments. Heat treatments can raise the temperature of water to levels that are not safe for specific fish species and coral types. To ensure the viability of all living creatures in an aquarium, they should be moved to a safe space that is outside of the treatment space. Chemical pesticide treatments require less movement as long as there is no risk of chemical pesticides reaching the water. If the water becomes contaminated through pesticide exposure, it can affect the health of all living organisms within the tank. In these instances, the water will need to be replaced to ensure the safety and health of the aquarium inhabitants.
- Pet food dishes should be emptied, cleaned, and covered, and any pet bedding should be laundered thoroughly to eliminate any bed bugs and prevent reinfestation.
- Plants can remain in your home but should be moved away from windows and walls to protect them from direct exposure to treatment chemicals. In the event that a home is heat treated, the plants will need to be removed from the heated space. It is important to inspect plants for bed bug activity before returning the plants when treatment is completed.
By following these steps, you ensure that your pets are protected from potential harm and that your plants remain safe during the bed bug treatment process.
What to Expect from Bed Bug Treatment
Embarking on bed bug treatment involves a commitment of time and effort, with most households dedicating 1 to 3 days to prepare their homes adequately. This preparation is crucial for the success of the treatment and aims to create an environment where every corner of your home is accessible for thorough treatment. On the day the pest control professionals arrive, it's important to minimize what you take with you as you leave the premises. Only wear clothes that have been previously laundered and stored in sealed bags to reduce the risk of inadvertently transporting bed bugs outside of the home.
Following the initial treatment, patience and vigilance are key. It's common for a second treatment to occur approximately two weeks after the first. This is to address any bed bug nymphs that have hatched since the first treatment which helps ensure the complete eradication of the infestation. Understanding what to expect during and after the treatment process can significantly reduce stress and help you manage the situation more effectively.
When Can You Return After Bed Bug Treatment?
One of the most common questions homeowners have is when it is safe to return to their home. It's essential to vacate your premises before the treatment starts, both for your safety and to give the pest control professionals the space to work effectively. Generally, you should plan to stay away from your home for a minimum of 4 hours post-treatment. However, this timeframe extends to at least 12 hours for individuals who may be more vulnerable or sensitive to the chemicals used in the treatment process. This includes anyone who has breathing problems, is pregnant, or babies under 18 months old.
This cautious approach ensures that the treatment has adequate time to work while minimizing exposure to any potentially harmful chemicals. Additionally, it allows for any treated areas to ventilate and for the chemicals to dry completely, which reduces the risk of chemical exposure upon your return. Following these guidelines is crucial for the safety and health of all occupants and contributes to the overall effectiveness of the bed bug eradication process. It’s also important to follow any specific instructions or advice provided by your pest control professionals regarding re-entry, as different treatments might require different safety protocols.
What Do You Do After Bed Bug Treatment?
It’s important to follow specific post-treatment guidelines to ensure the effectiveness of the eradication process and to prevent any potential re-infestation. Upon returning home, there are several steps you should undertake to maintain the integrity of the treatment and to safeguard your living environment:
- Refrain from washing floors around walls or windows for 2 weeks. This precaution helps to preserve the treatment's residue, which continues to act against any residual bed bugs or eggs that might hatch post-treatment.
- Commit to sweeping or vacuuming floors every day for 1 week. This practice helps to remove any dead bed bugs or debris resulting from the treatment.
- If a mattress cover has been installed during the treatment, it's imperative that it remains on for up to a year. These covers are designed to trap any remaining bed bugs inside the mattress, eventually leading to their demise. Removing the cover could release any surviving bed bugs and nullify part of the treatment's effectiveness.
- Carefully open plastic bags containing clean blankets, sheets, and clothes. Returning these items to use should be safe now so items that were marked as clean can be reintroduced. It may be wise to only reintroduce necessities as follow up treatments are common. If a follow up treatment is needed, the preparation checklist will need to be completed again so keeping most things in bags may make sense until the infestation is officially cleared.
- It's now safe to rearrange your furniture and other items back to their places. Doing so will help in assessing the treatment's impact and in ensuring that your living space is comfortable and conducive to your daily activities.
What If I Don’t Prepare for Bed Bug Treatment
Failing to adequately prepare your home for bed bug treatment can significantly hinder the effectiveness of the eradication efforts and potentially exacerbate the infestation. Pest control technicians arrive with the expectation that certain preparatory steps have been taken by the homeowner to facilitate access to infested areas and minimize the risk of spreading the pests. Without these preparations, technicians are faced with limitations that can prevent them from performing the treatment effectively.
The mishandling of items such as bedding, clothing, and furniture during an unprepared treatment can inadvertently spread bed bugs to previously uninfested areas of your home which complicates the infestation further. Moreover, the lack of preparation can lead to damage or destruction of personal belongings, as pest control technicians may accidentally spray or treat an item that shouldn’t be. Essentially, the failure to prepare not only prolongs the treatment process but can also increase the complexity and cost of fully eradicating the bed bug infestation.
Contact EcoGuard Pest Management if You Are Dealing with Bed Bugs
As you navigate the challenges of a bed bug infestation, remember that you're not alone. EcoGuard Pest Management is your dedicated partner in reclaiming your home from these unwelcome guests. Our team of bed bug control experts is equipped with the knowledge, tools, and strategies needed to effectively address your bed bug concerns. We understand the stress and discomfort bed bugs can cause, and we're here to provide you with the peace of mind that comes from knowing your infestation is being handled by professionals. If you're battling bed bugs, don't hesitate to reach out to EcoGuard Pest Management. Let us help you enjoy a clean, pest-free home once again.
Bed Bug Treatment Preparation FAQs
What to do before bed bug treatment?
Before bed bug treatment, it's crucial to thoroughly prepare your home to ensure the effectiveness of the extermination process. Start by decluttering your living space, laundering all possible bedding and clothing at high temperatures, and sealing them in bags. Additionally, move furniture away from walls, vacuum thoroughly, and encase mattresses and box springs to prevent bed bugs from escaping or entering these areas. Proper preparation not only facilitates a smoother pest control process but also significantly enhances the chances of successfully eliminating the bed bugs.
How do you clean your house before bed bug treatment?
To clean your house before bed bug treatment, begin by decluttering to remove potential bed bug hiding spots and make treatment areas more accessible. Vacuum your entire home thoroughly, including floors, furniture, and any cracks or crevices, then seal and dispose of the vacuum bag outside. Wash and dry all bedding, curtains, and clothes at high temperatures, and store them in sealed bags to prevent re-infestation. This preparatory cleaning is a vital step in ensuring the treatment is as effective as possible.


